Discover the causes why pin hole generated in PU lacquer on wood and learn effective remedies. Ensure a smooth, flawless coating by understanding and preventing these common defects.
Pinholes in coatings like polyurethane (PU) lacquers on wood can be caused by several factors. When such defects appear during or after curing, it can be a source of frustration for those looking for a smooth, defect-free finish. Here are some of the common reasons why pinholes might be generated:
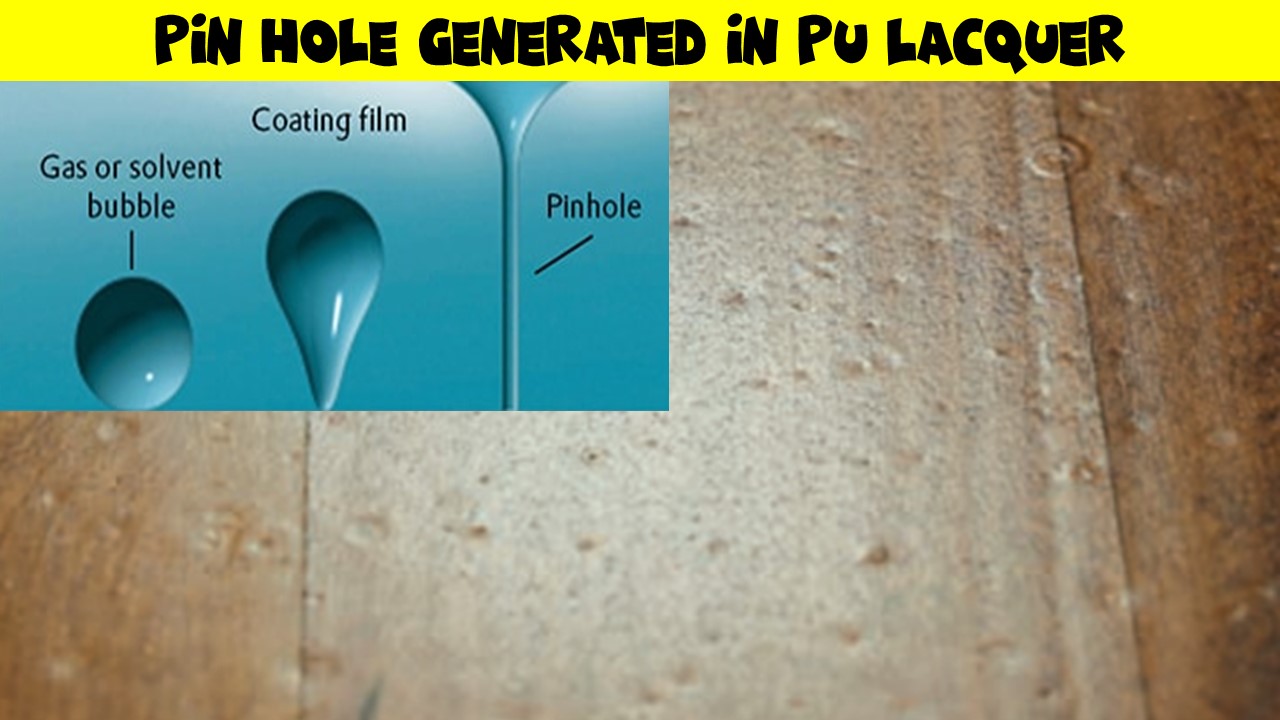
Common Reasons Why Pin Hole Generated in PU Lacquer
Air Entrapment:
If the PU lacquer is mixed or applied too vigorously, air can become entrapped in the mixture. As the coating begins to dry or cure, these trapped air bubbles rise to the surface and burst, leaving behind pinholes.
Wood Porosity:
Wood is a natural material, and different types or cuts of wood can have different levels of porosity. Highly porous woods can release air or gases when coated, leading to the formation of pinholes.
Solvent Release:
PU lacquers often contain solvents. As the lacquer cures, these solvents evaporate. If the solvent evaporates too quickly or if the coating is applied too thickly, the rapid solvent release can result in pinholes.
Contamination:
If there are contaminants on the wood surface or in the lacquer (like dust, oil, or other foreign particles), they can disrupt the formation of a smooth film and lead to pinholes.
Incompatible Coatings:
If a PU lacquer is applied over a previous coating or sealer that is not fully compatible or not properly prepared, it can cause poor adhesion and the formation of pinholes.
Temperature and Humidity:
Extreme environmental conditions, such as high temperatures or high humidity, can impact the curing process and result in pinholes. They can affect the rate of solvent evaporation and cause the coating to skin over before underlying solvents or air bubbles have had a chance to escape.
Inadequate Film Thickness:
Applying the lacquer too thinly can make it more susceptible to pinholing. Conversely, extremely thick applications can trap solvents and air, also leading to pinholes as they try to escape.
Curing Too Quickly:
If the PU lacquer is forced to dry or cure too quickly (e.g., by using heaters or fans), it can lead to surface skinning while the underneath layer is still releasing solvents, leading to pinholes.
How to Prevent Pinholes in PU Lacquer
- Ensure the wood surface is clean, dry, and free from contaminants.
- Use the correct application techniques, avoiding overworking the lacquer.
- Apply the recommended thickness and allow adequate drying time between coats.
- Control the application environment, keeping it free of dust and at a suitable temperature and humidity.
- Use quality products and ensure compatibility between layers.
By taking these precautions, the likelihood of encountering pinholes during the curing of PU lacquer on wood can be significantly reduced.
What Treatments to be Applied if Pin Hole is generated already?
If pinholes have already formed in the PU lacquer on a wood surface, they need to be addressed to achieve a smooth, defect-free finish. Here’s how you can rectify the situation:
Sanding:
Once the lacquer has fully cured, begin by lightly sanding the affected area using a fine-grit sandpaper (e.g., 220 or 320 grit). This will help smooth out the surface and prepare it for the subsequent treatment.
Ensure you don’t sand through to the wood or the underlying finish. The goal is just to smooth out the pinholed area and not remove the entire layer of lacquer.
Clean the Surface:
After sanding, thoroughly clean the surface to remove any dust or debris. You can use a tack cloth or a damp (not wet) cloth.
Ensure the surface is completely dry before proceeding to the next step.
Reapply Lacquer:
Apply a thin coat of the PU lacquer over the sanded area, ensuring you use proper application techniques to prevent the recurrence of pinholes.
Allow the newly applied coat to dry as per the manufacturer’s recommendations.
Inspect and Repeat (if necessary):
Once the new coat has dried, inspect the area for any remaining defects.
If pinholes or other imperfections are still visible, you might need to repeat the sanding and re-coating process until you achieve a smooth finish.
Final Sanding and Polishing (Optional):
Once you are satisfied with the finish, you can perform a final light sanding using a very fine grit sandpaper to achieve an ultra-smooth surface.
If desired, you can also apply a polishing compound or wax to give the surface a high-gloss shine. This step is optional and depends on the desired look.
Preventative Measures for Future Applications:
To minimize the chance of pinholes forming in future applications:
- Ensure the environment is free from dust or contaminants.
- Do not overwork the lacquer during application.
- Allow adequate drying time between coats.
- Maintain proper environmental conditions (temperature and humidity) during application and curing.
- Use high-quality products and ensure you mix and apply them according to the manufacturer’s guidelines.
By addressing the pinholes and taking steps to prevent them in the future, you can achieve a smooth, flawless finish with PU lacquer on wood.
Conclusion
Pinholes in PU lacquer finishes on wood can compromise the appearance and quality of the coating. These imperfections arise from various factors, ranging from air entrapment to environmental conditions during application. To achieve a consistent and smooth finish, it’s crucial to understand the root causes and apply appropriate remedial measures. By ensuring proper surface preparation, using quality products, and adhering to recommended application techniques, one can significantly reduce the likelihood of such defects, ensuring that wood finishes remain both visually appealing and durable.
External Reference:
- https://www.basiccoatings.com/about/blog/blog/2021/11/10/pinning-down-pin-holes
- https://www.kuegroup.com/how-to-avoid-pinholes/